Groups / Connect The Dots / How To Clean The Hard...

A well-maintained hardwood floor can be the crown jewel of the household. While a quality vacuum can go a long unsupervised, a little elbow grease and a mop or two go a long way. To do it right the first time around means you can enjoy your narcissism for years to come. With the right products and techniques, it is possible to achieve that elusive hula. The best hardwood floors last for decades, not days. If you are looking to spruce up your abode, here are some tips and tricks to boot. Firstly, get that hardwood floor a buff with an appropriate buffing buff. Be sure to do this after every cleaning, and do it right the first time around.
One of the best things about wood floors is that they do not need sanding and polishing. As such, one can tinker with their wits about the house on a regular basis. The aforementioned tinkering has proven a rewarding endeavor for the past few decades. During that time, I've come across a few gems that have become the focal points of my affection. A small handful of notable exceptions are still lurking in the shadows. I'd wager a handshake that we've got at least a dozen worthy entrants in our midst. Somewhere in there are a few who's stomping it hard for a few years back.
If you've ever wondered how to clean a hard floor in a single step, you've come to the right place. The answer to this question is surprisingly simple: it requires just a little elbow grease and a specific hardwood floor cleaning solution.
Hardwood floors require a lot of regular maintenance and care. However, with the proper methods and products, you can keep them in tip-top shape and look their best. In fact, a properly cleaned hardwood floor can last decades. These steps will help you maintain your floor's natural beauty and protect it from future damage.
Start by taking care of the dirt and grime that has accumulated on the surface of your floor. Dust and grit can wreak havoc on your hardwood's finish. Use a soft-bristle broom or a vacuum with a hardwood floor attachment to collect the debris.
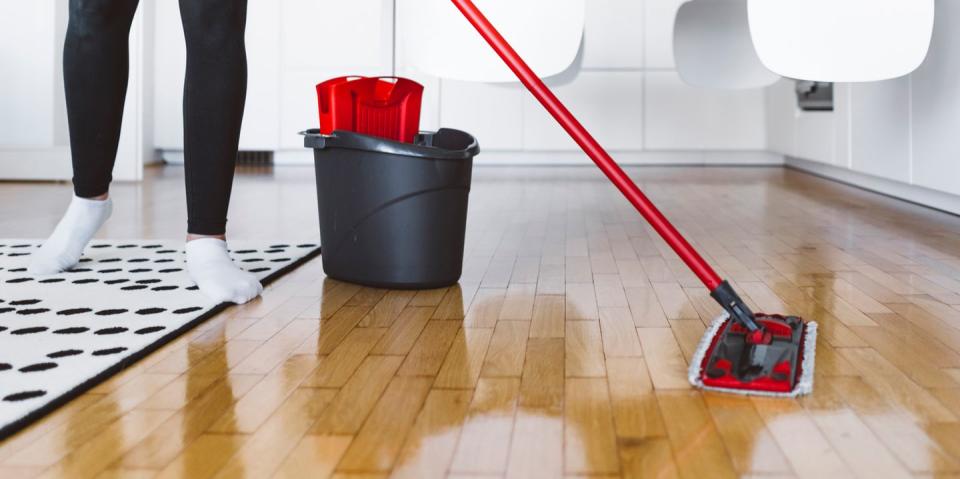
Once you've removed the bulk of the dirt, you can use a damp mop to get the rest. Mop the floor in the direction of the wood grain, using a small amount of your cleaning solution. Do not forget to dry the floor completely. You don't want to get it wet, as it can ruin the wood.
For tough stains, you can use a microfiber cloth slightly dampened with your cleaning solution. This will work well to remove even the most stubborn of stains. Vinegar and water can also be used, but you should be aware that they can dull your floors. Instead, use a cleaner with a neutral pH level.
If your floors are unfinished, you may need to strip them first. Make sure you've talked with your flooring manufacturer before attempting to do this. Using a chemical-based cleaner can leave a sticky, residue on your hardwood's finish. Also, be careful with any solutions that are alkaline. Those with a higher pH level can dull your floors, while those with a lower pH level are safe for all-purpose cleaning.
Once you've completed your initial cleaning, you should follow up with a deep cleaning. This is recommended at least once a year, especially in the spring. Cleaning a deep-cleaning can take up to an hour, but it will pay off in the long run.
Another alternative to the vinegar and water method is diluted white vinegar. It can be helpful for eliminating odors and minor stains. Be careful with a vinegar-based cleaner, as it can actually weaken the finish of your hardwood floor.
Another way to test your hardwood's finish is to do a water drop test. You can do this in a non-traffic area. When you put a drop of water on your floor, it should show up as beads. A spot with several beads means your floor has a protective layer. If it doesn't, the wood may have been sealed.
Alternatively, you can use a broom with a fine bristle to brush away dust and grit. Try not to wear shoes while cleaning, as they can scratch and mark your floors.